
Preamble
Cluck!!
It’s amazing what you can do when you have too much time on your hands! I wanted, for a long time, to have a webcam monitoring my chickens. More just for fun more than any other reason. It has however giving me greater insight into there lives!
Chicken feed
Hardware
The major problem with the installation is that is it is quite a long way to the chicken run.
I had a choice of either
Run mains power – This would be a really a big job requiring full isolation and burying the cable the requisite depth. So this choice was out.
Run a battery/solar webcam – I would have loved this route as it initially seems the the simplest. On investigation all webcams of this type, that I could find, were not rtsp. Thus they use a proprietary protocol which would not lend itself easily to this development.
Passive POE – the hardware consists a of an injector (to put power in) and a splitter (to take power out) With this setup you plug the webcam power adaptor into the injector and the 12v are carried along 4 of the 8 wires in the cable to the splitter where the power is separated again.
Active POE – this is similar, but uses a custom power supply to inject the power. In my case a 48v supply. Due to a higher transmitted voltage the length of the cable can be greater. Greater voltage implies less resistance for the same power. Power = Voltage x Current, and Resistance = Voltage/Current.
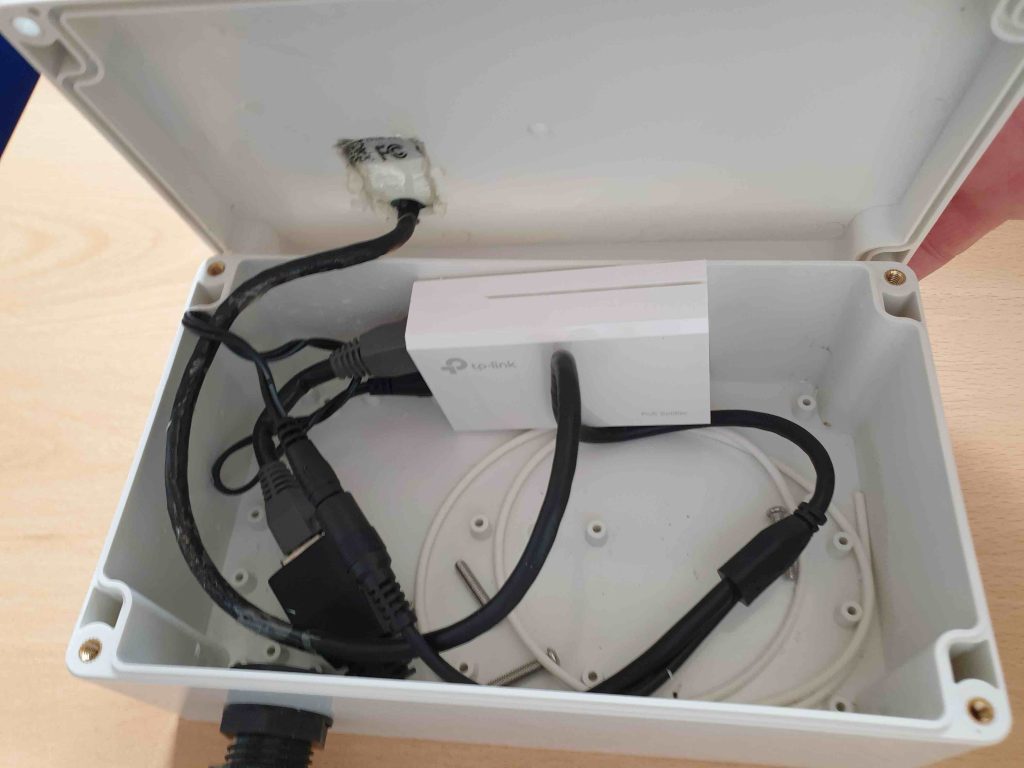
As I have a long run to the chicken run, obviously Active POE was my best choice and I chose to use the TP-Link injector and splitter (TP-LINK TL-POE200).
Running an external wire also poses 2 risks, lightening risk and a hacking risk.
hacking risk – Someone could connect directly to my network. Who would be that mad? Russians or local boy scouts? I would be very interested to find out! The hacking risk is relatively trivial as I don’t l let any of the data escape my IOT vlan inside the house..
lightening risk – I deemed this a little more serious, so purchased a surge protector.
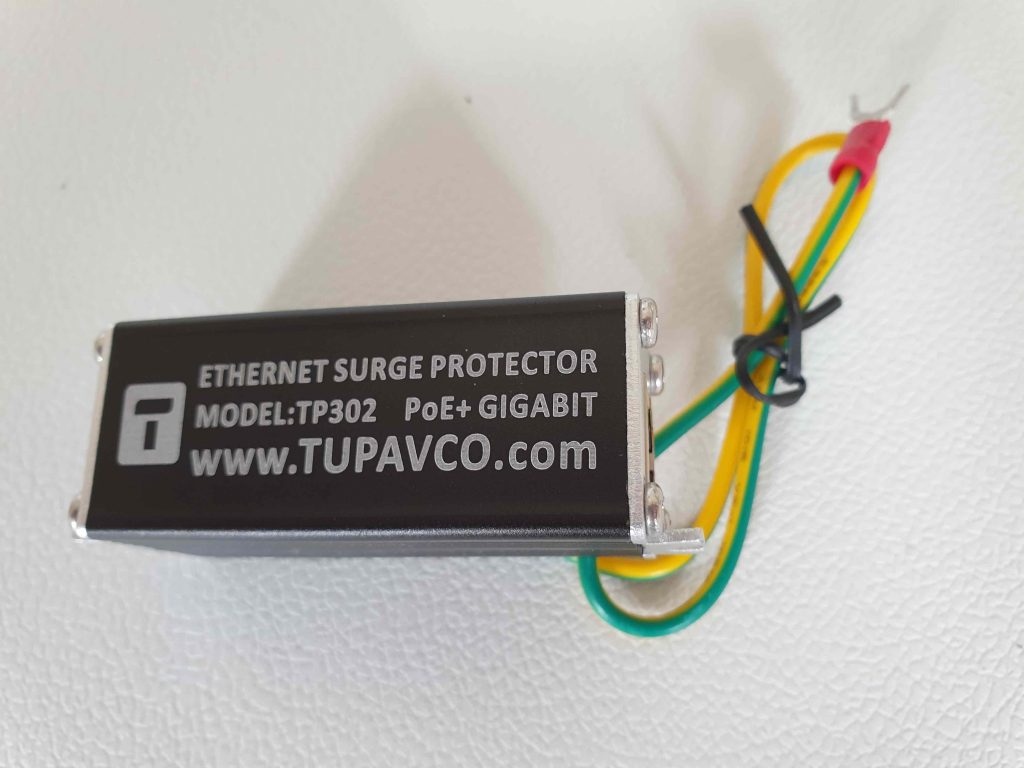
This device ‘should’ earth any lightening and save my house and house side hardware from possible fire. I didn’t purchase one for the chicken side as they are quite expensive, so if it gets hit, that side will be toast! I’d lose maximum an old webcam and an POE splitter.
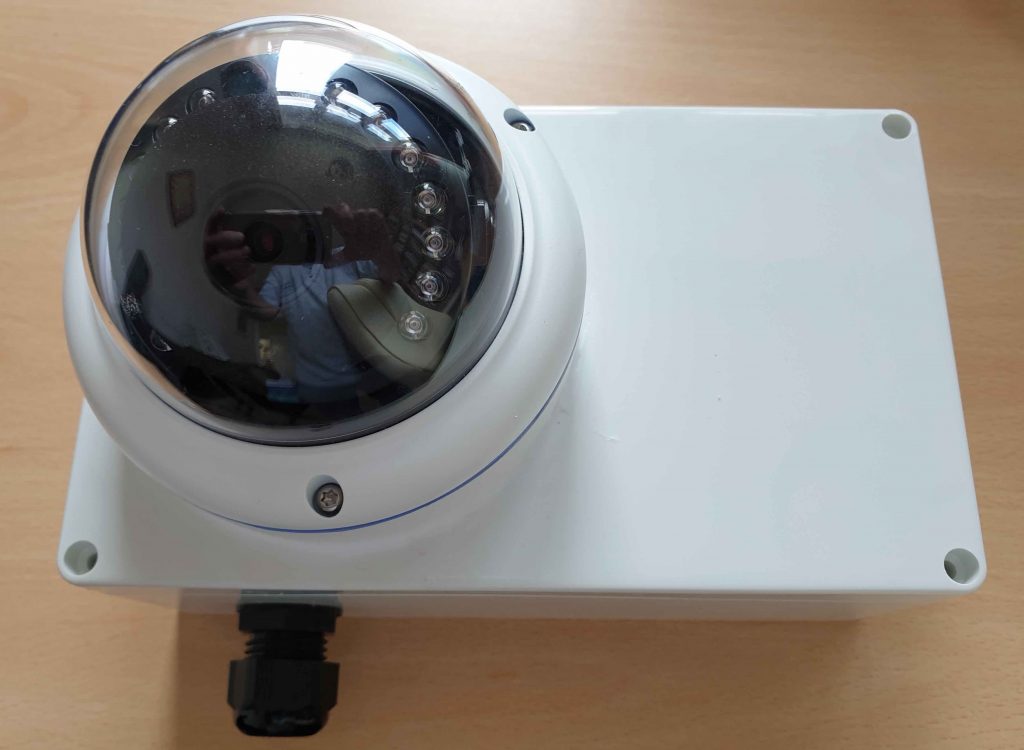
I put it all together in an ABS plastic project box that has a silicone O-ring that runs around the joint. Also after gluing on the camera, I ran some silicone bathroom sealant around he camera in order to try to keep out any remaining water. Hopefully it will be watertight for a few years.
The plan for deployment was:
switch ->cable -> POE injector -> cable -> isolator (under house) -> cable ->POE splitter -> cable -> camera
In order to make minimal holes in my house I only drilled a 1/4 inch hole by the switch to feed the wire under the house, and fed the chicken run bound cable in through an air brick. This left me with the task of crimping on some RJ45 connectors under the house (not the best place to be doing this!)
Never having crimped any RJ45 connector before, I discovered this is not as easy as it looks. In future I will probably buy a cable if I can rather than fiddle with making them up. Anyone wanting to make some, I would suggest having some good practice first.
I also discovered that there exists pass through connectors which allow the wires to come completely through so it is a lot easier to check you have located the wires correctly and in the right order. However, be warned, you MUST trim the extra lengths completely. I install everything and then my switch was reporting ‘crosstalk’, which after some pondering I gathered was a partial short at the end of the RJ45. After cleaning this up, all worked well.
Software
The software stack is
Camera-> FFmpeg -> Webpage
Camera – I used “IP camera viewer 2” on my mac to check out the camera and work out the RTSP connection string, and then later tried “Surveillance Station” on my NAS to check it all worked.
FFmpeg – Is the glue I used to generate MPEG DASH files that could be picked up in a web browser. I followed Kevin Godell’s guide to its use, which can ca be found at https://gist.github.com/kevinGodell/f91ae4087b0a56c138842dbb40cbfe7c
The standard FFmpeg that comes with synology is quite old and restricted so I used the one published from the Synology community at http://packages.synocommunity.com
Initially when I tried this the feed always stopped fractionally short of 30 seconds. I need to add the command “-rtsp_transport tcp”. For some reason I think the UDP flow is getting broken, but in my small setup don’t think running with TCP will make much difference.
I currently run FFmpeg in a script at boot up.
As this project is only for research and not for profit I expect very few hits however I did decide to limit the outbound bandwidth just to be sure, if say China decides its a good idea to look at my chickens all through lockdown!
Conclusion
Great fun putting it together, however making RJ45 connectors was very fiddly.